What is difference between a common rail injector test bench and an injector tester simulator?

Common Rail Injector Test Bench:

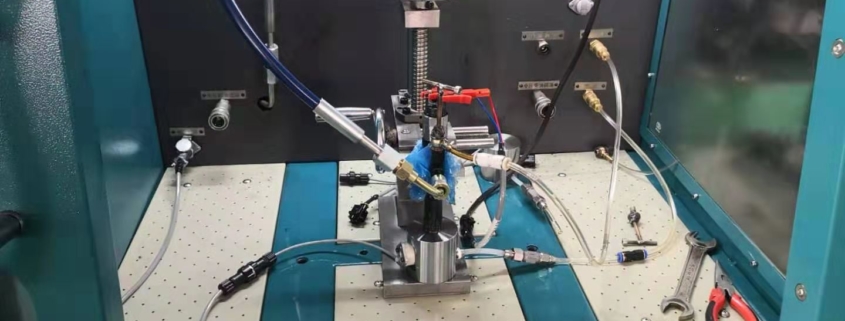
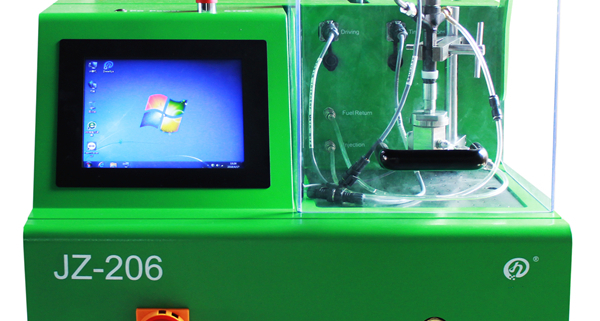
Functionality: A common rail injector test bench is a comprehensive tool used to test and diagnose common rail injectors, which are a type of fuel injector used in modern diesel engines.
Testing Capabilities: It is designed to perform various tests on common rail injectors, such as checking injector response times, fuel delivery rates, injection pressure, and spray patterns.
Complexity: These machines are typically more advanced and can handle the specific testing requirements of common rail injectors, which operate under high pressures and precise control.

Injector Tester Simulator:

Functionality: An injector tester simulator, on the other hand, is a simpler device that primarily simulates the electrical signals and conditions necessary to test injectors.

Testing Capabilities: It focuses on simulating the injector signals that an engine control unit (ECU) would send to the injectors during normal operation.
Use Case: It is often used for bench testing injectors outside of the engine, allowing technicians to verify the injector’s electrical functionality, such as solenoid operation and response to ECU signals.

Key Differences:

Purpose: The common rail injector test machine is specifically designed for diagnosing and testing common rail injectors, covering a wide range of mechanical and performance tests. In contrast, an injector tester simulator is more limited and focuses on electrical testing and simulation.

Complexity and Capability: Common rail injector test machines are more complex and capable of performing detailed mechanical tests such as spray pattern analysis and pressure testing, which are critical for diagnosing injector performance issues in modern diesel engines.

Application: The choice between the two depends on the needs of the technician or workshop. Common rail injector test machines are essential for in-depth diagnostic work on common rail injectors, while injector tester simulators are more suited for basic electrical testing and verification.

In summary, while both devices deal with injectors, the common rail injector test bench is a comprehensive diagnostic tool for advanced testing, whereas an injector tester simulator is simpler and focuses primarily on electrical simulation and basic functionality testing.

diesel injector pump repair

Why the diesel engine has no enough power?

Symptoms of insufficient engine power: It is reflected in the acceleration performance and climbing ability, especially in the case of heavy load, the engine power is obviously insufficient, the accelerator is soft, and the speed of the vehicle cannot be increased rapidly; the exhaust is dull, the driving is weak, and the fuel consumption increases linearly… Sudden and strong, usually mainly rely on the driver’s feeling to judge.

The following introduces the causes of insufficient power and troubleshooting methods:

01

The “gas” problem

Intake system failure

Intake system: air filter – intake pipe – supercharger – intercooler – combustion chamber

(1) The air filter is clogged

The blockage of the air filter causes the intake resistance to increase and the amount of air entering the cylinder to decrease, resulting in incomplete diesel combustion and insufficient engine power.

Maintenance suggestion: Regardless of whether the air filter is wet or dry, the air filter core should be cleaned frequently or the dust on the paper filter element should be removed, and the filter element should be replaced if necessary to ensure that the air filter is clean. In spring, there are many willow catkins in the air, which can easily block the filter element. It should be checked more and cleaned up in time.

(2) The connecting pipes of the air system are worn and the joints are loose

The supercharged diesel engine relies on the exhaust pressure to blow the turbine to drive the pump wheel to rotate at a high speed and deliver compressed air to the intake duct. Guaranteed engine power. Therefore, the intake and exhaust systems of supercharged diesel engines must be completely sealed. If the exhaust pipe or joint leaks, the exhaust pressure will drop, the speed of the supercharger will drop, the intake pressure of the engine will decrease, and the engine power will naturally drop. If the air intake system includes the intake duct, the inter cooler and the joints, if the air leaks, then although the intake pressure provided by the supercharger meets the standard, the amount of air that actually enters the engine will be obviously insufficient, which will reduce the engine power.

This kind of failure also often occurs on new cars. After the new car has been running for a period of time, the pipeline will continue to expand and contract when exposed to heat, and the joints are easily loosened.

Maintenance suggestion: The driver should regularly check the pipeline and the connection, if there is any looseness and tightening; the new car should be compulsorily maintained after a period of use.

(3) Air cooling system

The inter cooler box and the water tank are adjacent to each other. Over time, the two components will interfere due to deformation and displacement, which is easy to cause the wear of the inter cooler box, resulting in air leakage and reduced air pressure.

Maintenance suggestion: The air leakage of the intercooler should be repaired at the designated service station of the OEM, and the intercooler should be replaced if necessary. Usually, the driver should check the inter cooler frequently, check the deformation and interference, and maintain it regularly.

02

The “diesel fuel” problem

fuel intake system failure

Fuel inlet system: fuel tank – fuel pump – primary filter – fine filter – fuel injection pump – fuel injector – combustion chamber.

(1) The diesel filter is blocked

The debris in the oil causes the diesel filter to be blocked, causing the diesel flow resistance to increase, the amount of oil entering the high-pressure pump to decrease, and the amount of diesel injected into the cylinder to decrease accordingly, resulting in insufficient output power of the diesel engine.

Maintenance suggestion: Check and clean the diesel filter element frequently, and replace it if necessary. The diesel filter should be replaced after driving 10,000-12,000 kilometers to ensure that the diesel filter is clean.

(2) The fuel inlet pipeline is blocked and the bend is dead

The low-pressure oil circuit is blocked or the diesel pipeline is bent, causing the oil circuit to be blocked and the diesel flow resistance to increase.

Maintenance suggestion: Check and re-install the low-pressure diesel pipeline, replace the pipe fittings if necessary, and ensure the diesel pipeline is unobstructed.

(3) Wear of the oil pump

The piston of the oil transfer pump is worn, resulting in insufficient pressure, small oil absorption, and the oil supply cannot keep up.

Maintenance suggestion: regular maintenance of the oil transfer pump

03

Problems with the electronic control system

The failure of the electronic control system leads to the lack of engine power, which has become a common sudden phenomenon, and there is no warning – any small problem such as poor wire contact, sensor damage, and excessive sensor gap may lead to failure.

Learn about:

Electronic control reasons

(1) The throttle position sensor is faulty. For example, the throttle valve is too dirty, the sensitivity is decreased, and the response is slow.

(2) The air flow sensor is faulty. If the detected data is inaccurate or there is fouling on the hot line of the air flow meter.

(3) The coolant temperature sensor is faulty. If the temperature of the coolant cannot be reflected correctly, an error signal is provided.

(4) The intake pipe pressure sensor is faulty. If the signal cannot be output, the computer keeps the engine running according to the preset signal, but the preset signal cannot be adjusted with the change of the vacuum degree, resulting in the deterioration of the engine performance.

(5) The crankshaft position sensor and the camshaft position sensor are faulty. If the speed signal cannot be transmitted correctly, it will cause the engine to ignite incorrectly.

(6) The Hall sensor is faulty. If the computer does not work well, the fuel injection time is too long. After the oxygen sensor detects it, the computer will reduce the fuel injection pulse width and make the mixture thinner, resulting in poor engine operation.

(7) Poor circuit contact. Such as poor contact of the connector terminals on the side of the injector wiring harness, poor contact of the ground wire, etc.

(8) Assembly errors.

Repair suggestion:

Power on self-check, the fault light will flash to show the fault condition. The driver is advised not to move, and if the vehicle can continue to drive, find a nearby maintenance station of the OEM to troubleshoot the problem. In addition, many drivers have the habit of flushing the engine with water, which should be avoided, because it is easy to cause the electronic control components around the engine to fail.

04

Problem with the engine itself

(1) Valve wear

After a long period of action and wear between the engine valve rocker arm and the valve, the gap will become larger and larger. If the gap is too large, the intake air volume will be insufficient, and the exhaust volume will be insufficient, which will affect the combustion and work of the diesel engine, resulting in insufficient power output of the diesel engine.


Maintenance suggestion: The valve clearance should be adjusted regularly to make it reach the specified value. Some drivers who understand maintenance can make adjustments by themselves. If you don’t understand, don’t tamper with it, and ask professional repairmen to help you adjust.

(2) Engine wear

There are sand and soil debris in the engine air chamber, poor oil lubrication, and high or low water temperature (normally 80~90 degrees Celsius), which will cause the piston ring and cylinder liner to wear and tear. Over time, the wear is too large, and the cylinder compression pressure will be low. , the fuel combustion is insufficient, reducing the effective output power of the diesel engine.

Maintenance suggestion: a comprehensive maintenance should be done when the vehicle travels 40,000 to 50,000 kilometers, and each part of the engine should be maintained.

Maintenance reminder: Poor fuel quality may also cause engine power failure. Vehicle diesel engines are required to burn diesel fuel with a cetane number greater than 45, and diesel fuel below this standard has poor combustion characteristics. Drivers should try to choose large regular gas stations to replenish fuel.

Track summary:

There are various reasons for the lack of power. In many cases, the problem of lack of power will disappear after the fault is eliminated. There are also times when there is no problem with the car itself, but the driver reports that the power is insufficient and wants to increase the power.

The problem of slow acceleration of the truck, and the driver’s unhappy driving, can be solved in two ways in the past:

The first is to adjust the fuel injector by the fuel injector test bench, increase the fuel injection volume of the fuel injector, generally increase the fuel injection volume of the pre-injection point, and adjust the fuel injection volume. This method is technically difficult and difficult to operate. Just blowing smoke.

The second one is to install a horsepower amplifier, which has obvious side effects, such as increased fuel consumption, smoke from the vehicle and even burn out the engine.

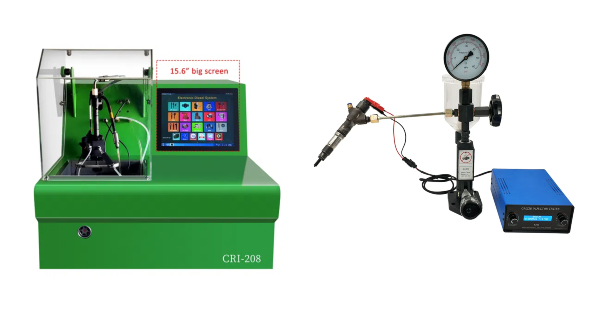
ISA coding

What Is Coding? Why Need A Code?

Recently many customer especially some trader asked me: what is coding? why we need coding after testing? because few years ago, in Chinese market coding is not need by the repairman, they just repair the injector as per test bench test results and experience, the injector will work properly on the engine, but in recently two years why more and more repairman cares about if the machine can generate a code after testing?

ISA coding

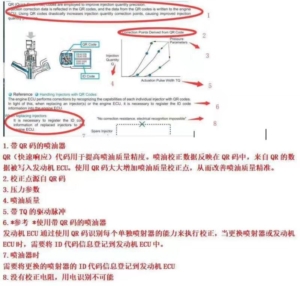
Now we have a look at what is QR coding from the below statement.

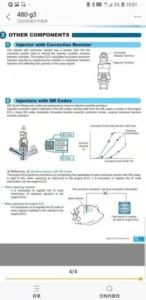
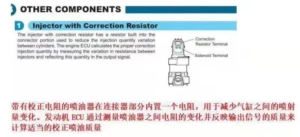
so you can see that correction resistor is important, to make it simply, in the past days, after the injector is repaired well and installed in the engine, it is working properly, but the engine performance may not be as comfortable as the injectors were not repair, because the assemble and repair must change tiny parameter of the injector working status, it could not be 100% same as before, at this situation, test bench generates a code, the code is created based on the collection of  injection and return voulme and in many points, the code is like a communication protocol, and repairman input this code into ECU,the ECU will know how to adjust itself to controls and injection very well, at this stage, the ECU working performance will be to its perfect situation, same as before injector was not repaired.

if without coding after repair, the injector may have the following several issues:

  • Performance especially in fuel consumption or black smoke – the vehicle can be driven away and not notice any difference. In reality, if the injectors have not been coded,the driver may come back to the garage because they have the problem of an increase in fuel consumption or black smoke
  • Non start – In some latest systems, the vehicle will not start if injectors is without a code.
  • Poor / lumpy running – as the injectors are not coded, the ECU will carry on fueling as if the previous injector was , The engine management light is also likely to on, which maybe lead to another visit to the garage.

What type injectors needs coding?

DELPHI CR Injectors –  Typical code is 16 alphanumeric characters (C2i Injectors) or 20 characters for more recent applications (C3i injectors).

DENSO Common Rail Injectors – QR code, Denso tried to make some injectors which are no need a coding, but finally that technology is not successful, so only except for a few types and some very early releases models which are not need coding, most injectors require coding, Typical code length is 16-24 alphanumeric characters dependent upon vehicle model.

VDO/Siemens CR Injectors’– Only VW applications at this moment require coding.

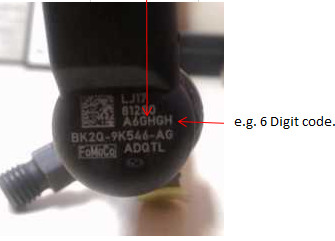
BOSCH Common Rail Injectors – all require coding, although some earlier releases may not, in simple terms if an IMA code is present then the injector will need coding. Typical length of code is 6-10 digits and found on Injector head.

Cummins injectors: till now only one model is know as needing a code, it is 9 digital, this type injector is widely used on the many vehicle.

Test bench produced on our company can encode the above injectors, if you have an interests, please feel free to contact.


Diesel injector test

How To Repair The Common Rail Injector By Using Adjusting Shims? – Stage 3 Repair Solution.

Firstly we introduce the different working conditions of the common rail injectors:

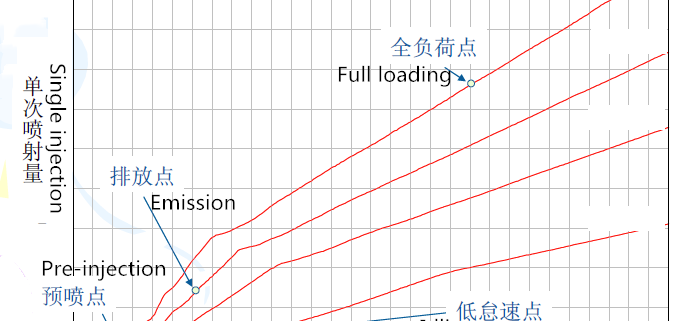
1) Full loading diesel fuel return: long power-on time, maximum rail pressure, fuel return, judge common rail injector sealing, whether there is enough diesel fuel supply capacity.

2) Full load fuel injection: long power-on time, maximum rail pressure, fuel injection quantity, determine the maximum fuel injection capacity of the common rail injector

3) Emission injection quantity: medium power-on time, medium rail pressure, fuel injection quantity, medium load determination, acceleration characteristic diesel fuel quantity of the common rail injector

4) Pre-injection quantity: short power-on time, medium-high rail pressure, fuel injection quantity, judge injector’s response ability, eliminate noise of the diesel injectors

5) Low idle  injection quantity: long power-on time, low rail pressure, fuel injection quantity, judge whether the starting and idle diesel quantity is qualified

a) Foreword: All shims inside the common rail injectors, if in contact with the spring, directly affect the spring force; if contact with other parts directly affects the fit clearance or stroke between the parts.

b) Intermediate shims (needle valve stroke)

When the adjusting shims is thickened, the stroke of the nozzle is correspondingly reduced, which is equivalent to the smaller opening of the nozzle, and the flow rate of the long power-on time is most affected (including the total load).

c) armature stroke shims

The shims is thickened, the corresponding position of the solenoid valve is increased, the lift of the armature is increased, and the amount of diesel fuel is increased accordingly, which affects the fuel quantity of all test points, and the test point of the short energization time is particularly obvious.

d) Buffer stroke gasket (overlift shims)

The gasket is thicker and the over-lifting is smaller. The gasket has no significant effect on the fuel quantity, but the excessively thick gasket may cause the armature core to not fall, which may affect the valve ball seal, and vice versa. .

e) Grease spring adjusting shims.

The gasket is thickened and the spring force of the nozzle spring becomes larger. Under the condition of lower rail pressure, the needle valve is more difficult to open and the diesel quantity becomes smaller. When the rail pressure is higher, the spring force is much smaller than the upward force of the needle valve, and the influence can be neglected. Therefore, at low idle points, the diesel quantity has an obvious influence.

f) Solenoid valve spring adjusting shims

The shims is thickened, the spring force of the solenoid valve becomes larger, the armature response is more difficult, the response speed becomes slower, the diesel fuel quantity becomes smaller, and the fuel quantity at the discharge point is mostly affected.

The video is a demstration of stage 3 repair skill:

https://www.youtube.com/watch?v=lgfn2meNmPw

common rail injector test bench

Common Rail Injector Test And Repair

If a common rail injector is blocked by impurities, how to detect it? Common rail Injector trouble-shooting points- common rail injector tester:

1, If using diagnostic sanner to check it, no fault code or fault code content has nothing to do with the injector; ü

  1. The rail pressure can reach more than 25MPa when starting; ü
  2. The injector circuit has a pulse voltage signal.

Common rail Injector tester – injector stuck check points:

  1. No fault code or fault code content is irrelevant to the injectorwhen using a diagnostic scanner.
  2. The rail pressure can be established at start-up, but it cannot reach 25MPa (no pulse voltage at the injector);
  3. When the engine fails to start, the common rail injector does not have return quantity. ü
  4. After the start-up, remove the common rail injector, and there are signs of fuel injection at the front end of the injector.

Common rail injector backflow is very bigger than usual, following points to check:

1, no fault code or fault code content has nothing to do with the injector; ü

2, low pressure oil circuit is normal; ü

3, rail pressure can not reach 25MPa;

  1. Disconnect the fuel injector from the fuelreturn pipe and check the backflow which is bigger
  2. If you check which injector has a large amount of fuelreturn, you can replace the injector one by one to see if the fault phenomenon disappears.

Remark: Under normal circumstances, when the injector is not energized, the injector will start to return when the rail pressure reaches 60MPa.- common rail injector test

common rail injector tester

The Necessary Conditions For BOSCH Common Rail Injector To Start Fuel Injection

The necessary conditions for BOSCH common rail injector to start fuel injection.

The necessary conditions for BOSCH-common rail common rail engine injector to start fuel injection

Common rail pressure exceeds the minimum set value (>350bar)

Synchronization signal is normal:

Sensor signal ≥ trigger threshold (related to air gap and speed)

The phase is correct

1: Check whether the rail pressure sensor is normal

Unplug the rail pressure sensor and check the rail pressure sensor harness end with a multimeter: 5V between 1-2, 5V between 1-3 is normal, or you can use a pin of multi-meter to connect 2 holes, another pin on the table,if 4.8. v is normal, the third hole, is about 4.8v is normal.

Note: 1 is the power ground, 2 is the signal, 3 is the power supply

Second, high idle speed

High idle speed means that only one speed is 1100 rpm after the engine is started, and the accelerator pedal is invalid.

High idle speed is generally caused by a throttle problem.

The throttle of the common rail engine is a double potentiometer type. Check the throttle line: the first voltage should be 5V, the second voltage is 5V normal; see the first signal voltage of the diagnostic scanner is about 2 times the second signal voltage which is normal.

If the first voltage is not 5V, it is 3.2V (the same voltage as the common rail). At this time, remove the rail pressure sensor, and the voltage of the throttle becomes 5V, indicating that the rail pressure sensor fails and the common rail assembly is replaced.

ECU damage determination

Reason 1: Lose self-test function; (Occasionally lost, everything else is normal, ECU also has bad possibility)

Reason 2: Accelerated abnormality;

Reason 3: Excluding all peripheral line faults, the problem cannot be solved. Consider the ECU internal program problem, the probability is very small.

Fourth, the parameters to be noted on the diagnostic instrument

Set rail pressure value

The difference between the actual rail pressure value and the set rail pressure value should be less than 200hpa, otherwise stated

Actual rail pressure

Synchronization status

The starting instant sync signal should fluctuate between 3-48, and finally 48 means signal synchronization.

Cycle fuel injection

Rail pressure control integral

When the idle speed is between -2000 and +2000 is normal; less than -2000 indicates that the pipeline is blocked or leaking, the diesel is not smooth; more than 2000 indicates the injector, backflow pipe leak.

Rail pressure closed loop state

Torque limit state

Cooling water temperature

Pressure after intercooling

After cooling


Description of rail pressure: When the actual rail pressure value is less than the set rail pressure value of 200hpa or more, the fault code is reported:

P1011 rail pressure closed-loop control mode fault 0–the rail pressure is lower than the target value; this fault may be reported as an instant, then the fault will disappear when the difference between the two is within the allowable range.

The cause of this failure is a low (slight) blockage of the low pressure circuit (most likely the fuel filter is clogged)

The rail pressure cannot be established, ie the engine cannot start. There are two possibilities that rail pressure cannot be established: one is that the low-pressure fuel circuit is blocked or leaked, and the other is that the high-pressure fuel circuit is leaking (due to the difference in fuel content, the water content may cause the cylinder injector to become stuck, which may cause high-pressure fuel. If the leakage causes the rail pressure to be unable to be established, it cannot be started. The method can be judged; the fuel return of each cylinder can be checked and compared to determine whether the injector is good or bad. A historical fault code may be displayed from the diagnostics at this time:

P1014 rail pressure control deviation fault—mode 7, rail pressure control deviation fault—mode 10.

◆ Rail pressure closed loop state: 0 represents open loop state, 3 represents no diagnostic closure, 5 represents closed state, and 14 represents stomping state

◆Torque limit status

Bit 0: Engine Torque Limit in Error Status Bit 1: Maximum Torque Limit

Bit 2: Maximum Speed Limit Bit 3: Smoke Limit

Bit 4: Oil limit in error state Bit 5: Thermal protection limit

Bit 6: Drive Torque Limit in Error Status Bit 7: Transmission Torque Limit

Bit 8: Pump Balance Maximum Torque Limit

◆ Synchronization status (the number of the synchronization signal greater than 12 is less than 48 is garbled, 48 is the synchronization state)

Rail pressure release valve opens

If the engine accelerates up to 1700 rpm, and the fault light is on, the fault code read out is: the rail pressure release valve is open. At this point, you can feel it by hand: you will find that the temperature of the common rail return line is 50 °C higher than the temperature inside the common rail. At this time, the rail pressure in the common rail is a constant value of 720,000hpa!

Remedy: After turning off the key switch, turn off the whole vehicle for 20 seconds or even a few minutes, then turn on the power of the whole vehicle, turn on the key switch to start, the rail pressure release valve should be reset, and the starting is normal.

There are two possibilities for the opening of the rail pressure relief valve: the fuel metering valve on the high pressure pump is open and the return line is blocked. If these two conditions exist, the bleed valve cannot be reset.

When it is not possible to start, try to open the fuel metering valve one or two times. When the fuel metering valve is opened, the high pressure pump is equivalent to the mechanical pump. At this time, the rail pressure relief valve is opened. If the valve is opened more times. If it is too much, it will not be automatically reset. It is equivalent to the failure of the rail pressure relief valve. It is necessary to change the common rail. Therefore, generally do not pull the fuel metering valve.


How to read the fault code through the fault indicator

The ignition switch is ON → standby and operating conditions can be carried out → (for the diagnostic request switch is the automatic reset switch) press – release the diagnostic request switch; (for one open and close and then press back) can be activated Flash code → only one fault code is flashed for each operation, and all the fault codes can be read in sequence; the corresponding fault can be detected according to the fault code table;

How to manually clear the fault code?

When there is a fault in the engine, this method is generally not used. Once the fault code is cleared, the electronic control maintenance personnel can not find the cause of the fault when reading the fault code with the diagnostic instrument, it is difficult to take corresponding measures to repair,When the engine is all normal, you need to try this method when you need to clear the historical fault. Sometimes it can’t be cleared. It is best to operate it through the diagnostic device.

Specific operations:

Turn off the key switch for about 30 seconds → turn on the diagnostic request switch on the meter → immediately turn the key switch to the ON position → for 4 to 8 seconds → turn off the diagnostic request switch on the diagnostic request switch on the meter.

Common Rail Injector Test Steps

Common rail injector test steps:
In the common rail test bench, the injector test goes by 4 or 5 steps: Leak test, VL, LL, VE, EM ,Pre-injection, some customers ask what is the meaning of this step, today we talk about these step’s meaning, and how it affects the engine’s performance
LEAK TEST: Sealing test
In this step, the control system does not trigger the injector. The pressure rises slowly from 0 bar to a maximum pressure of 1600 bar. Seeing with eyes,if the nozzle is free from dripping fuel, The injector housing has no leakage. The system simultaneously measures the static fuel return to judge if the high pressure seal ring, ball and seat damaged or not ( in this step if the nozzle dripping fuel, engine will emit black smoke, work violent, the fuel return volume bigger will cause difficult start, frequent flameout, speed limit, metering unit exceeds the maximum value)
VL: Full load fuel quantity
This step simulates the engine full-load fuel injection, and the system flow sensor accurately detects the fuel injection amount and the return amount. The displayed flow rate is the single injection value of the injector. The effect of the amount of fuel injection is the same as that of the Euro 2 system. The DNH gasket in the injector is adjusted to save fuel. The amount of fuel return is further detected whether the control valve set of the common rail injector is damaged

TL\EM Average point\Drain point\Exhaust gas limit fuel supply( all are same, just different description)
This step is similar to the torque of the traditional Euro 2 system torque point, and achieves the purpose of discharge.
If the amount of fuel is too small, the engine is weak, the speed is slow, the power is insufficient, the smoke is too large, and the emission standard is not reached. The AH, DNH, VFK, and DFK gaskets can be adjusted to obtain a satisfactory acceleration curve.
LL: Idle fuel supply
Simulate engine idling conditions, this step should ensure that the idling fuel is in the range
within the perimeter,if the consistency is not good, the speed is unstable, and it is easy to flame out and the noise is loud. Larger idling fuel quantity causes excessive speed and smoking, if small idling fuel quantity ,engine is easy to flame out, not easy to start the engine or slow down!
VE; pre-injection
Pre- injection is a small amount of fuel injected into the engine before injection.
Heat, reduce noise, better for cold start, reduce emissions, pre-injection bigger will increase noise knocking, engine blue smoke, too small will cause start difficulty, there is acceleration noise when engine acceleration , acceleration is not smooth, more violate for acceleration.

Pasos de prueba comunes del inyector del carril:
En el banco de pruebas Common Rail, la prueba del inyector pasa por 4 o 5 pasos: prueba de fugas, VL, LL, VE, EM, preinyección, algunos clientes preguntan qué significa este paso, hoy hablamos sobre el significado de estos pasos. , y como afecta el rendimiento del motor.
PRUEBA DE FUGAS: prueba de sellado
En este paso, el sistema de control no dispara el inyector. La presión aumenta lentamente desde 0 bar hasta una presión máxima de 1600 bar. Al ver con los ojos, si la boquilla no gotea combustible, la carcasa del inyector no tiene fugas. El sistema mide simultáneamente el retorno de combustible estático para determinar si el anillo de sello de alta presión, la bola y el asiento están dañados o no (en este paso, si la boquilla gotea combustible, el motor emitirá humo negro, funcionará de forma violenta, el volumen de retorno de combustible más grande causará dificultades) inicio, llama frecuente, límite de velocidad, unidad de medición excede el valor máximo)
VL: Cantidad de combustible a plena carga
Este paso simula la inyección de combustible a plena carga del motor, y el sensor de flujo del sistema detecta con precisión la cantidad de inyección de combustible y la cantidad de retorno. La tasa de flujo mostrada es el único valor de inyección del inyector. El efecto de la cantidad de inyección de combustible es el mismo que el del sistema Euro 2. La junta DNH en el inyector se ajusta para ahorrar combustible. ¡La cantidad de retorno de combustible se detecta aún más si el conjunto de válvulas de control del inyector de riel común está dañado!

TL \ EM Punto medio \ Punto de drenaje \ Límite de suministro de combustible de combustible (todos son iguales, solo descripciones diferentes)
Este paso es similar al torque del tradicional punto de torque del sistema Euro 2, y logra el propósito de la descarga.
Si la cantidad de combustible es demasiado pequeña, el motor es débil, la velocidad es lenta, la potencia es insuficiente, el humo es demasiado grande y no se alcanza el estándar de emisión. Las juntas AH, DNH, VFK y DFK se pueden ajustar para obtener una curva de aceleración satisfactoria.
LL: ¡Suministro de combustible inactivo!
Simular las condiciones de ralentí del motor, este paso debe garantizar que el combustible al ralentí esté en el rango
dentro del perímetro, si la consistencia no es buena, la velocidad es inestable, es fácil de apagar y el ruido es fuerte. La mayor cantidad de combustible al ralentí causa una excesiva velocidad y humo, si es pequeña la cantidad de combustible al ralentí, el motor es fácil de apagar, ¡no es fácil arrancar el motor o desacelerarlo
VE; pre-spray
La inyección previa es una pequeña cantidad de combustible inyectado en el motor antes de la inyección.
El calor, reducir el ruido, mejor para el arranque en frío, reducir las emisiones, pre-inyección más grande aumentará el ruido, el humo azul del motor, demasiado pequeño causará dificultades de arranque, hay un ruido de aceleración cuando la aceleración del motor, la aceleración no es suave, más se viola la aceleración .

Injection pump test bench

How To Test A Diesel Injection Pump – 2

How To Test A Diesel Injection Pump ?

2 Operation requirements of the diesel pump test bench

2.1 Installation of the tested high pressure pump on the test bench

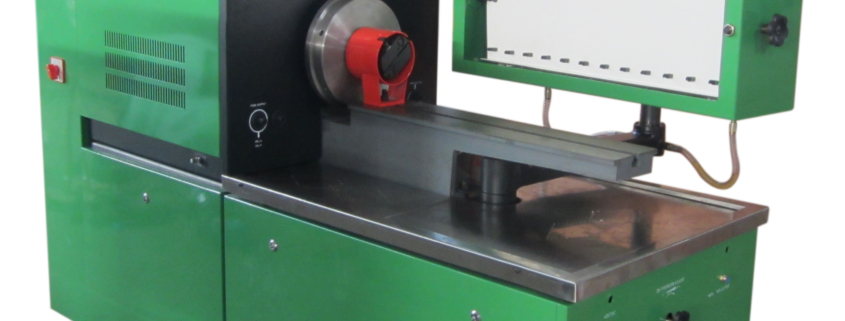
The high pressure pump is fixed to the table rail by special clamping devices. The front end of the high pressure pump is connected to the test bench universal joint via a coupling. When installing, it must be ensured that the high-pressure pump camshaft is coaxial with the test-table drive shaft, which can be achieved by installing a special pad between the high-pressure pump and the guide rail. After initial fixing, turn the universal joint dial 1 to 2 turns. When it feels smooth, tighten the large bolt and nut. After installation, the high-pressure pump should run smoothly and reliably, be firm and reliable, and have no jitter and looseness.

2.2 Start and stop of the diesel pump test bench

The pump test bench is connected to the three-phase power supply, and the speed control handle is turned to make it in the zero position. When the motor start button (green) is pressed, the motor can be started. When stopping, turn the speed control handle to reduce the dial speed to zero first, then press the stop button (red) to avoid stopping at high speed. The test bench will be damaged and an accident will occur at the next start-up.

2.3 Speed adjustment of the injection pump test bench

According to the required speed and direction, select the gear position of the gearbox, and turn the speed control handle to change the speed. The greater the deflection angle of the speed control handle, the higher the speed.

2.4 Pressure regulation of the fuel system for the injection pump test bench

The pressure of the fuel system is regulated by a pressure regulator. When the handwheel is rotated clockwise, the pressure can be adjusted within the range of 0 to 0.6 MPa, and the pressure can be adjusted within the range of 0 to 6 MPa when rotated counterclockwise. The pressure diesel fuel is sent from the fuel supply joint of the pump test bench to the high pressure pump under test through the fuel pipe.

2.5 fuel temperature control of the diesel pump test bench

When the fuel temperature is lower than 40 °C, turn the heating valve handle clockwise to increase the fuel temperature. When the fuel temperature reaches 40 °C, immediately close the heating valve to stop heating.

3 Maintenance and maintenance of the pump test bench

(1) In order to ensure the test accuracy of the pump test bench, the opening pressure of the standard injector should be checked frequently, which should be 17. 5 MPa; the uniformity of the standard injector should be checked regularly. If there is a difference, the opening pressure can be adjusted. Correction, if not correct, replace the standard injector.

(2) The test fuel must pass through the light diesel fuel which has been precipitated for more than 48 hours. It is necessary to replace the new fuel after commissioning 500 injection pumps or 400 hours of operation of the test bench. When changing diesel fuel, use kerosene to clean the fuel tank and filter. 30# or 46# turbine fuel is required for the transmission case and the hydraulic continuously variable transmission. Inject 40# mechanical oil or 150# mechanical oil into the gearbox. The oil level should not be lower than the oil-filled elbow, and it should be replaced every 400 h or half a year. The bearings in the tachometer seat should be lubricated with mechanical oil or turbine oil. When refueling, remove the mechanical watch and inject lubricant from the tachometer seat.

(3) Before starting of the pump test bench, it is best to use the lever to rotate the dial until the motor and fuel supply pump rotate at the same time, and then start the operation.

(4) Do not shift gears during the operation of the pump test bench or start the test bench at high speed, otherwise the hydraulic continuously variable transmission or gear will be damaged. When operating the speed control handle, slowly increase or decrease the speed, and do not operate quickly. When stopping, adjust the speed to zero to avoid damage to the transmission system and affect the service life of the injection pump test bench

Injection pump test bench

How To Test A Diesel Injection Pump?-1

How To Test A Diesel Injection Pump?-1

Fuel injection pump calibration machine operation:

Diesel engine performance depends to a large extent on the precise calibration of the fuel injection pump. Although the fuel injection pump test bench has strict technical requirements to ensure the accuracy of the fuel pump parameter adjustment, if the use and maintenance are not in place, the quality of the fuel injection pump cannot be guaranteed.


1 Technical requirements for diesel injection pump tester

(1) The scale error of the test bench should not exceed ±10 ‘ at any position, and the scale should be clear.

(2) The instantaneous speed fluctuation within each revolution of the output shaft of the pump test bench shall not exceed 1% of the test speed when the output shaft drive disk is measured at >600 r/min; the instantaneous speed fluctuation shall be when the speed is ≤600 r/min. Not more than 6 r/min.

(3) The counting mechanism of the pump test bench should be accurate and sensitive, and meet the counts of 100 to 1000 times. The allowable counting error of the whole system is 1 time.

(4) The measuring cylinder of the pump test bench must be clear and accurate. The minimum scale is not more than 1% of the full scale, and the scale error should be within 0.5% of the full scale.

(5) The fuel supply pressure of the pump test bench should be adjustable and stable. At the rated speed, the maximum pressure should be reached when the outlets are all closed: low pressure fuel passage ≥ 0. 4 MPa; high pressure oil passage ≥ 34 MPa.

(6) Debugging the high-pressure fuel pipe parameters of the in-line fuel injection pump:

length × outer diameter × inner diameter,

of which 600 mm × 6 mm × 2 mm for the injection pump debugging with a circulating oil supply of not more than 300 mm 3;

800 mm × 8 MM × 39 mmfor the injection pump with a circulating oil supply of more than 300 mm;

800 mm × 6 mm × 2 mm for the commissioning of the distributor fuel injection pump.

(7) The standard injector selected for the diesel pump test bench can be used for fuel supply per cycle not exceeding 300 mm3. When the fuel injection pump speed is 1000 r/min, the fuel supply rod is fixed at the position of 103 mm3 cycle, 1000 pumping fuel quantity When the oil amount is in the range of 102 to 103 cm3, the needle valve opening pressure is 17.5 MPa.

(8) For the fuel injection pump in use, due to the limitation of the quality , the fuel injection pump test should be carried out using the original fuel injector equipped on the engine. After the test, the pump installation should be aligned to the engine according to the order of the cylinders on the pump test bench. in order to ensure that the engine works under normal uniform fuel supply from the beginning, until the nozzle coupler is replaced. If the pump is tested with a standard injector and the engine is operated with a non-standard injector, it will not work under the required uniformity of fuel supply, thus losing the meaning of fuel injection pump calibration.
(9) The temperature of the diesel pump repair workshop has a great influence on the fuel supply of the fuel injection pump, because the degree of diesel fuel varies with temperature. The standard fuel supply quantity specified in the technical documents refers to the standard room temperature at 20 ° C the amount of fuel supplied. A test proves that when the temperature is lowered from 40 °C to 6 °C, the fuel supply can be increased by 20% to 40%, and the temperature is lowered again, The resistance of the diesel fuel is greatly increased, and the resistance through the high pressure fuel pipe and the injector is sharply increased. The fuel supply has decreased. In order to make the fuel supply test accurate, the temperature of the diesel repair workshop should be kept within the normal temperature range of 15-20 °C, especially the high-speed fuel injection pump is more sensitive to changes in fuel temperature.

common rail injector tester, diesel injector test

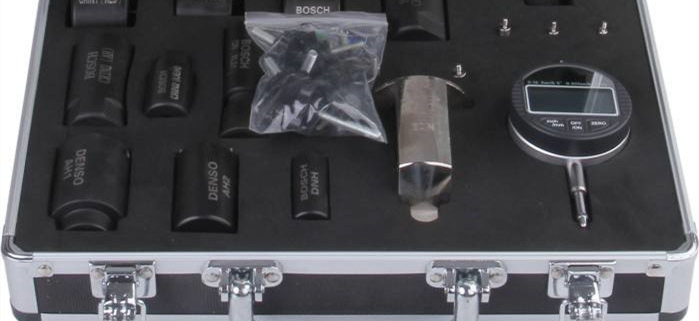
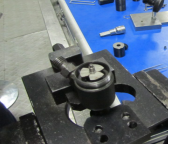
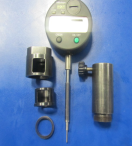
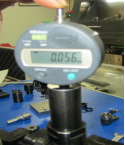
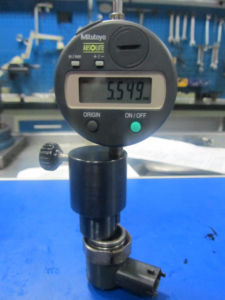
Common Rail Injector Tester-Stroke Measuring Tool ( Applys For Bosch CRI and Denso injectors)

Bosch CRI common rail diesel injector test- stroke measuing tool:

diesel injector test

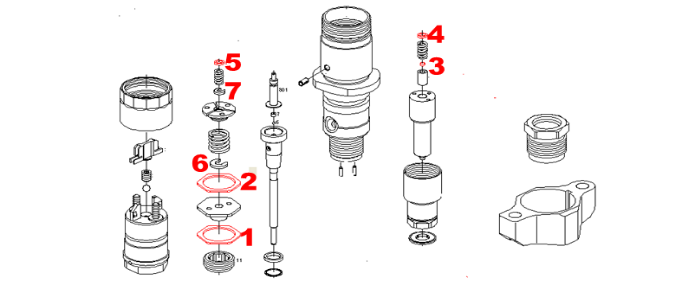
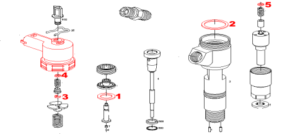
1:Armature lift adjusting shim

2:Remaining air gap adjusting shim

3:The armature total range adjusting circlip

4:Solenoid valve spring force adjusting shim

5:Nozzle spring force adjusting shims


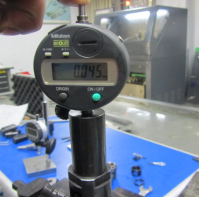
  1. Armature lift of the CRI diesel injector (standard value:45-45um)

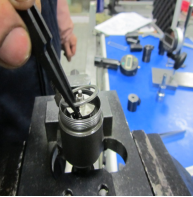
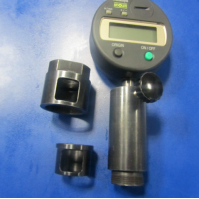
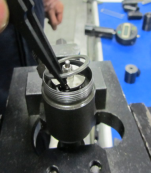
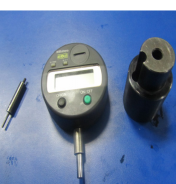
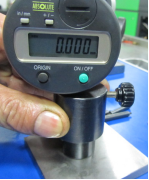
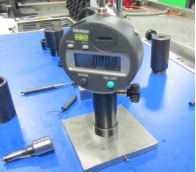
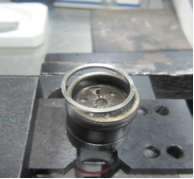
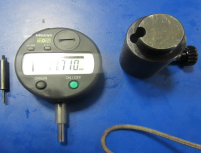
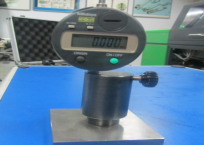
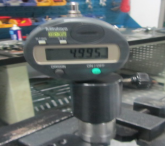
Remove solenoid valve, remove solenoid valve springs, shims, remaining air gap shims, put a small bush with openings into, screw the pressure cap with opening and screw it down according to <stand torque>, fit on adaptor and amesdial, make sure amesdial slide well and shows zero, gently press the top of the meter axis with fingers, repeatedly press a few times to ensure accurate accuracy, what it display now is: Armature lift.

diesel injector test


  1. The armature total stroke test data of the CRI diesel injector: (Standard values: 55-70um)

Remove the small circlip, remove the armature plate, spring, using special tool to dismantle valve assembly pressure cap, remove the armature assembly, ball valve and ball valve base, fit on the armature assembly and lift shims, screw down valve assembly pressure cap according to <stand torque>, fit on the armature plate, spring and circlip in order.  Fit on a thick shim, and put the bush with opening into, screw the pressure cap with opening and screw it down according to <stand torque>, fit on adaptor and amesdial, make sure amesdial slide well and show zero, gently press the top of the meter axis with fingers, repeatedly press a few times to ensure accurate accuracy, what it display now is: The armature total range.

diesel injector testing

3.Remaining air gap tester data of the diesel injector : (standard value: 3555um)

 Remove the solenoid valve of CRI diesel injector, put into remaining air gap shim, choose proper gauge stand adaptor and measuring pin, make amesdial show zero on flat surface.

3.1 Now test the distance between armature plate and remaining air gap, to test again after changing the angle to make sure accuracy, and make a record for the data.

 diesel injector test

3.2 Test the distance between remaining air gap and electromagnet, to make adaptor surface close together with solenoid valve end face when testing.  

Use the data to subtract the data tested by first step is remaining air gap.


DENSO common rail diesel injector stroke test data

Armature stroke test data: (standard value: 45-55um)

  1. Dismantle solenoid valve of denso injectors, choose adaptor, flat headmeasuring pin and amesdial, and make the amesdial show zero on flat surface, put the armature liftshim on the injector, make amesdial back and forth rotation to ensure the stability test, make a record for the data.

Precision shims common rail injector tester

2.Choose standard adaptor and make it show zero on flat surface, make the gauge stand adaptor surface close togetherinthe end face of the solenoid valves on the solenoid valve, put meausring pin in from gap of solenoid valve side to the bottom and to test several points to make sure testing accuracy, and make a record for the data.  Use this data subtract the data in step 1 is armature lift.

diesel injector repair

Common rail injector test steps and the impact to the diesel engine’s performance.

LEAK TEST: This test verifies that leakage of valve assembly, high pressure sealing ring, nozzle pin valve pressure cap part.

VL: Max injection amount: too large injection will bring smoke and large fuel consumption; too small injection amount will make the vehicle powerless and slow to speedup. The tolerance each common rail diesel injector should be controlled within 6mm3/HH when adjusting, which is mainly adjusted through nozzle prcision shims.

TL/EM: medium speed / emission point fuel injection amount, fuel injection characteristics verification point, excessive injection will bring smoke and emission exceed the standard; too small injection  will make the vehicle powerless and slow to speedup.  This is decided by nozzle spring shims, armature stroke, cross stroke adjusting shims and solenoid valve spring force shims.

LL idle fuel amount: excessive idle will bring smoke, too small will lost throttle and flameout, start-up difficulties, fuel amount unevenness will lead rotation speed do not stabilize, noise, and the engine swings during speedup.  Unevenness should be controlled within 2mm3/HH, which is mainly adjusted by nozzle spring force shims.

VE pre-injection fuel amount: too large the fuel will knock cylinder and bring smoke, too small will make large noise of the engin, start-up difficulties and powerless to speedup.  Unevenness should be controlled within 0.5mm3/HH, which is mainly adjusted by solenoid valve spring force shims.

Remarks: The premise of the above adjustment method is various range adjusted within its scope.